Rustic Unloaf Sourdough Bread – Easy No-Knead Artisan Loaf
If you’ve always wanted to bake homemade sourdough but felt overwhelmed by complicated techniques, this Rustic Unloaf Sourdough Bread is the perfect place to start. No endless stretch-and-fold sessions, no difficult shaping methods, and absolutely no commercial yeast required.
This relaxed, beginner-friendly recipe lets time and natural fermentation do all the hard work. The result is a beautifully crusty artisan loaf with a soft, airy crumb and deep tangy flavor that tastes like it came straight from a traditional bakery.
Made with only a few pantry staples, this rustic sourdough bread is ideal for toast, sandwiches, soups, or simply enjoying warm with butter.
Why You’ll Love This Sourdough Bread
Simple and Beginner Friendly
No kneading machines, complicated folding schedules, or advanced baking skills needed.
Naturally Fermented
This bread relies entirely on an active sourdough starter for rise and flavor.
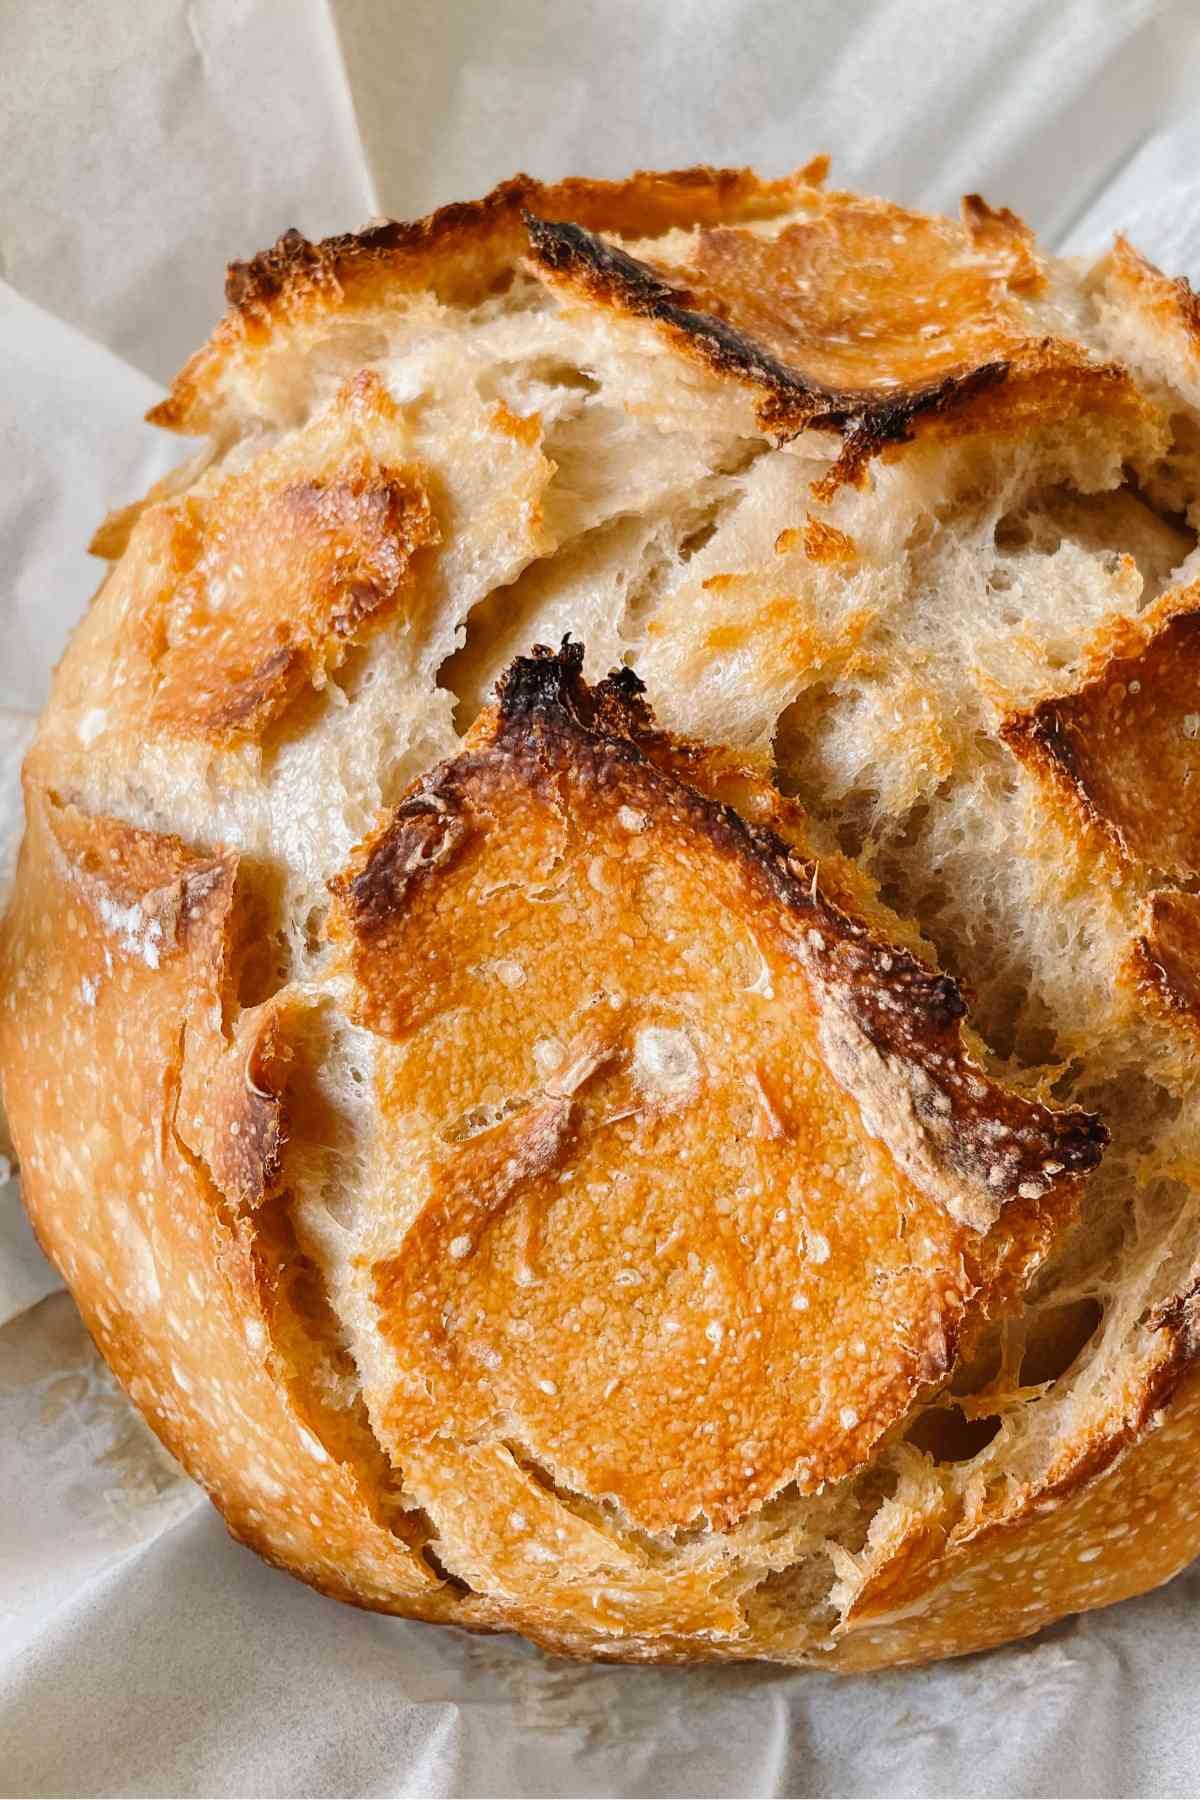
Crispy Golden Crust
The Dutch oven creates a bakery-style crust that turns beautifully golden and crunchy.
Soft Open Crumb
Despite the minimal effort, the inside stays light, chewy, and airy.
Mostly Hands-Off
The dough rests and ferments naturally while you go about your day.
Preparation & Baking Time
| Step | Time |
|---|---|
| Prep Time | 15 minutes |
| Autolyse Rest | 1 hour |
| Bulk Fermentation | 8–12 hours |
| Proofing Time | 1–2 hours |
| Bake Time | 45–50 minutes |
| Total Time | Approximately 14–16 hours |
Yield
1 large artisan loaf
Approximately 8–10 slices
Ingredients
You only need a few simple ingredients to create this homemade sourdough bread:
- 500g bread flour
(or 400g bread flour + 100g whole wheat flour) - 375g room-temperature water
- 100g active sourdough starter
(fed, bubbly, and active) - 10g salt
Step-by-Step Instructions
Step 1: Mix the Dough
In a large mixing bowl, combine:
- Flour
- Water
Mix until no dry flour remains. The dough will look rough and shaggy.
Cover the bowl and let it rest for 1 hour.
This resting stage is called the autolyse, which helps hydrate the flour and naturally develop gluten.
Step 2: Add Starter and Salt
Add the following ingredients to the dough:
- Active sourdough starter
- Salt
Mix thoroughly using clean hands or a dough whisk until fully incorporated.
The dough will feel sticky and loose — this is completely normal.
Step 3: Bulk Fermentation
Cover the bowl with plastic wrap or a damp towel.
Allow the dough to ferment at room temperature for 8–12 hours.
During this time, the dough should:
- Double in size
- Become airy and bubbly
- Develop a slightly domed surface
No kneading, stretching, or folding is required.
Step 4: Shape the Dough
Lightly flour your work surface and gently transfer the dough onto it.
Using floured hands or a bench scraper, shape the dough into a loose round or oval.
Be gentle to preserve the air bubbles created during fermentation.
Place the dough into:
- A proofing basket
- Or a bowl lined with a heavily floured kitchen towel
Cover and let proof for 1–2 hours at room temperature.
Optional Cold Fermentation
For deeper flavor, refrigerate the shaped dough overnight for 8–12 hours.
Step 5: Bake the Bread
Preheat your oven to 450°F (230°C) with a Dutch oven inside.
Once fully heated:
- Carefully remove the hot Dutch oven
- Turn the dough onto parchment paper
- Score the top with a sharp blade or knife
- Transfer the dough into the Dutch oven
- Cover with the lid
Bake covered for 25 minutes.
Remove the lid and continue baking for another 20–25 minutes until the loaf becomes deep golden brown with a crisp crust.
Allow the bread to cool for at least 1 hour before slicing.
Helpful Tips for Better Sourdough
Use an Active Starter
Your sourdough starter should be bubbly and doubling in size within 4–6 hours after feeding.
Don’t Add Too Much Flour
A wetter dough creates a lighter, airier crumb.
Handle the Dough Gently
Avoid pressing out all the trapped air during shaping.
Want More Flavor?
Cold-proofing the dough overnight enhances the sour flavor beautifully.
No Dutch Oven?
Bake on a preheated baking tray and place a pan of hot water in the oven to create steam.
Frequently Asked Questions
Can I Use All-Purpose Flour?
Yes, but bread flour gives better structure and a chewier texture.
Why Doesn’t This Recipe Need Kneading?
Long fermentation naturally develops gluten over time, making kneading unnecessary.
Can I Refrigerate the Dough Overnight?
Absolutely. Refrigerating after shaping improves flavor and makes scoring easier.
Why Didn’t My Dough Rise Properly?
An inactive or weak sourdough starter is usually the main reason.
Nutrition Information
Per Whole Loaf
| Nutrient | Amount |
|---|---|
| Calories | ~1600 kcal |
| Carbohydrates | ~320g |
| Protein | ~50g |
| Fat | ~5g |
| Fiber | ~12g |
| Sodium | ~2000mg |
Per Slice (1/10 Loaf)
| Nutrient | Amount |
|---|---|
| Calories | ~160 kcal |
| Carbohydrates | ~32g |
| Protein | ~5g |
| Fat | ~0.5g |
| Fiber | ~1.2g |
| Sodium | ~200mg |
Nutrition values are approximate and may vary depending on ingredients used.
Final Thoughts
This Rustic Unloaf Sourdough Bread proves that homemade artisan bread does not have to be complicated. With no kneading, no stretch-and-fold routine, and minimal hands-on work, this recipe delivers a flavorful bakery-style loaf using the power of natural fermentation alone.
Whether you are a beginner baker or simply looking for a simpler sourdough method, this easy recipe is one worth adding to your baking routine forever.


