Mini Sourdough Loaf Recipe 🍞✨
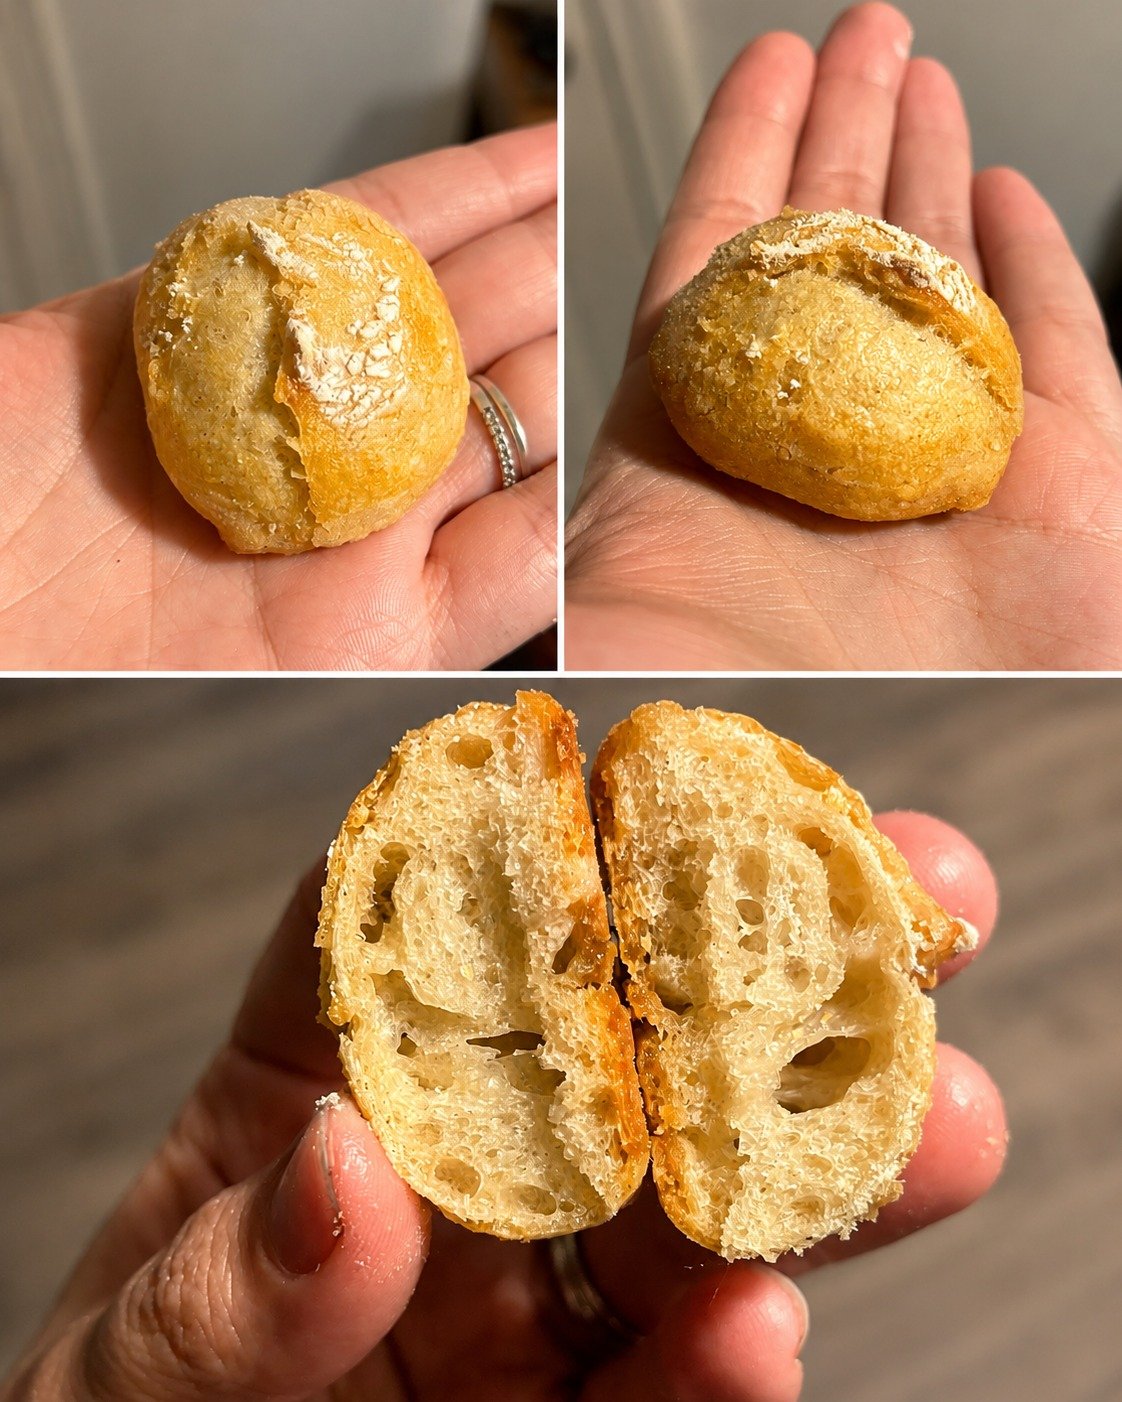
Sometimes the tiniest bakes are the most exciting — and this adorable mini sourdough loaf proves exactly that. Even though it’s small enough to fit in the palm of your hand, it still goes through the full sourdough process: mixing, stretch and folds, bulk fermentation, cold proofing, and baking until golden brown.
This tiny loaf is perfect for experimenting with sourdough techniques without committing to a full-size bread. It’s fun, cute, surprisingly satisfying, and honestly a great way to practice fermentation timing and dough handling on a miniature scale.
If you’ve ever wanted to make a tiny sourdough loaf just for fun, this recipe is simple, beginner-friendly, and incredibly rewarding.
Why You’ll Love This Tiny Sourdough
This mini loaf is:
- Adorably small and fun to make
- Great for sourdough practice
- Perfect for beginners
- Uses only a tiny amount of starter
- Crispy outside and soft inside
- A creative weekend baking project
Even though it’s tiny, it still develops that classic sourdough flavor and texture.
Ingredients
You only need a few simple ingredients:
- 1 teaspoon unfed sourdough starter
- 1 teaspoon warm filtered water
- 3 teaspoons unbleached flour
- 1/8 teaspoon salt
That’s it!
Because the loaf is so small, measurements don’t need to be absolutely perfect. This recipe is more about the process and having fun.
Equipment Needed
- Small mixing bowl
- Spoon or mini spatula
- Muffin tin with cover or foil
- Parchment paper
- Oven
A covered muffin tin works perfectly because it traps steam and helps the loaf rise beautifully.
Step 1: Mix the Dough
In a small bowl, combine:
- Sourdough starter
- Warm water
- Flour
- Salt
Mix until a rough dough forms.
Because the dough is tiny, it may feel sticky at first. That’s completely normal.
Once combined, let it rest for about 15–20 minutes.
This short rest helps the flour hydrate and makes the dough easier to work with.
Step 2: Stretch and Folds
After resting, begin a few gentle stretch and folds.
Grab one side of the dough, stretch it upward slightly, then fold it back over itself.
Rotate the bowl and repeat.
Because the dough is miniature, this process only takes a minute or two.
Stretch and folds help build gluten strength and structure.
Step 3: Coil Folds
After the initial folds, continue with a few gentle coil folds during fermentation.
To do this:
- Lift the dough from the center
- Allow the ends to tuck underneath naturally
This helps strengthen the dough while keeping it airy and soft.
Even tiny sourdough benefits from proper gluten development.
Step 4: Bulk Fermentation
Leave the dough covered on the counter for about:
- 3–4 hours
The exact timing depends on your room temperature.
You’ll notice:
- Slight puffiness
- Small bubbles
- A softer texture
Because the dough is so small, fermentation can happen faster than expected, so keep an eye on it.
Step 5: Cold Proof
Once the dough has slightly risen, place it in the refrigerator for:
- About 3 hours
This cold fermentation helps improve flavor and makes the dough easier to score and bake.
Even a short cold proof adds that classic sourdough taste.
Step 6: Prepare for Baking
Preheat your oven to:
450^\circ F
Place your muffin tin into the oven while preheating so it gets fully hot.
A hot baking surface helps create oven spring and crispy crust.
Step 7: Bake the Mini Loaf
Place the dough into the hot covered muffin tin.
Bake:
- 10 minutes covered
- 15–20 minutes uncovered
The covered portion traps steam, helping the loaf rise.
The uncovered baking time develops the golden crust and deep flavor.
Bake until the loaf reaches your preferred color.
Tiny loaves bake quickly, so watch carefully near the end.
What Makes This Recipe So Fun
This recipe may look silly at first, but it actually teaches important sourdough skills:
- Fermentation timing
- Dough handling
- Gluten development
- Baking with steam
- Crust formation
And because it’s so tiny, mistakes feel low-pressure and easy to learn from.
It’s the perfect experiment for sourdough lovers.
Texture & Flavor
Despite its size, this loaf still develops:
- Crispy golden crust
- Soft chewy crumb
- Tangy sourdough flavor
- Beautiful tiny air pockets
It’s basically a full artisan loaf in miniature form.
Tips for Success
Use Active Starter
Even unfed fridge starter should still have some strength.
Don’t Overproof
Tiny dough ferments quickly.
Preheat Thoroughly
A hot muffin tin creates better oven spring.
Be Gentle
Small dough can lose air easily if handled roughly.
Fun Variations
Try customizing your mini loaf with:
- Sesame seeds
- Everything bagel seasoning
- Mini chocolate chips
- Herbs and garlic
- Parmesan cheese
You can even make several tiny loaves with different flavors.
Final Thoughts 🍞✨
This mini sourdough loaf may be tiny, but it delivers the full sourdough experience in the cutest possible way. From stretch and folds to golden crust, it proves that even the smallest loaf can be incredibly satisfying.
Whether you’re practicing techniques, experimenting for fun, or just making the world’s cutest sourdough bread, this recipe is guaranteed to make you smile.
Sometimes little bakes bring the biggest joy 🤍


