🍞 Soft Homemade Sandwich Bread Loaf (Bakery Style Recipe)
There is something truly comforting about a freshly baked loaf of bread sitting on your kitchen counter. The warm aroma filling the house, the golden crust gently crackling as it cools, and the soft fluffy slices waiting to be enjoyed — homemade bread is pure comfort food. Among all types of bread, a classic sandwich loaf is one of the most loved and versatile recipes in the world.
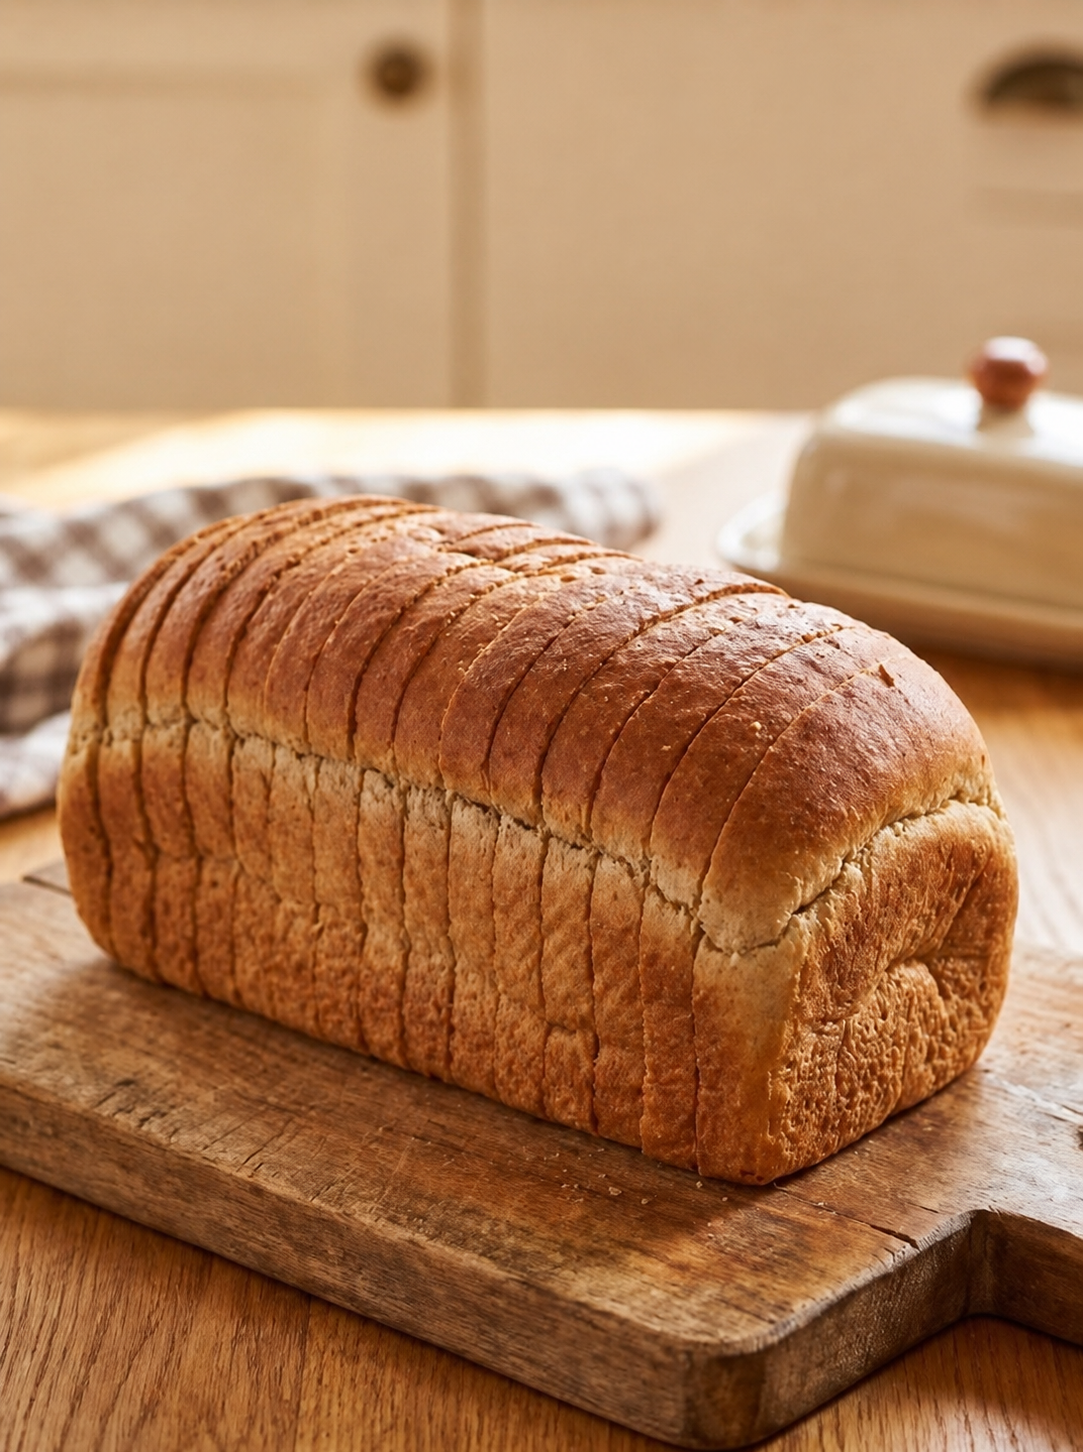
This soft sandwich bread loaf is perfect for everyday use. Whether you want to make sandwiches for breakfast, toast for evening tea, or grilled cheese for a cozy snack, this bread works beautifully in every form. It has a light texture, a slightly sweet flavor, and a soft crumb that melts in your mouth.
Even better, this recipe is beginner-friendly. You don’t need any professional baking experience or fancy equipment. Just simple ingredients, a little patience, and love for baking.
🧂 Ingredients for Soft Sandwich Bread
To make this fluffy bakery-style loaf, you will need the following ingredients:
- 3 ½ cups all-purpose flour (or bread flour for better texture)
- 1 cup warm milk
- ½ cup warm water (as needed)
- 2 tablespoons sugar
- 2 tablespoons unsalted butter (softened)
- 1 teaspoon salt
- 2 ¼ teaspoons dry yeast (1 packet)
These simple pantry ingredients come together to create a soft, rich, and perfectly balanced loaf of bread.
🥣 Step 1: Activating the Yeast
The first and most important step in bread making is activating the yeast properly. This step ensures that your bread rises well and becomes soft and fluffy.
Take a small bowl and add warm water. The water should be lukewarm — not too hot, not cold. Add sugar and yeast into the water and gently stir. Leave it for 5 to 10 minutes.
During this time, you will notice bubbles forming on the surface. The mixture will become frothy and light. This is a sign that your yeast is active and ready to use. If the mixture does not foam, it means the yeast is inactive and should be replaced.
🍞 Step 2: Preparing the Dough
Now take a large mixing bowl and add flour and salt. Mix them lightly so the salt is evenly distributed.
Next, add the softened butter and rub it into the flour using your fingers. This helps create a soft texture in the final bread.
Now pour in the activated yeast mixture along with warm milk. Start mixing everything together slowly. You will see the dough starting to form.
If the dough feels too dry, add a little extra warm water gradually. If it feels sticky, sprinkle a small amount of flour.
Once everything comes together, transfer the dough to a clean surface and begin kneading.
💪 Step 3: Kneading the Dough
Kneading is one of the most important steps in bread making. It develops gluten, which gives the bread its structure and softness.
Knead the dough for about 8 to 12 minutes. Push the dough forward with your palms, fold it back, and repeat the process.
At first, the dough may feel rough, but slowly it will become smooth, elastic, and soft. You should be able to stretch it slightly without tearing.
A well-kneaded dough is the secret to bakery-style soft bread.
⏳ Step 4: First Proofing (Rising Stage)
Once the dough is ready, place it in a lightly greased bowl. Cover it with a clean kitchen towel or plastic wrap.
Keep it in a warm place for about 1 to 1.5 hours. During this time, the dough will double in size.
This fermentation process is important because it develops flavor and creates air pockets inside the bread, making it soft and fluffy.
🍞 Step 5: Shaping the Loaf
After the dough has risen, gently punch it down to release the air. Do not press too hard — just enough to remove excess gas.
Now place it on a clean surface and shape it into a rectangle. Roll it tightly from one side to form a loaf shape.
Place the shaped dough into a greased loaf pan. Make sure it fits nicely and looks even on top.
⏳ Step 6: Second Proofing
Cover the loaf pan again and let it rest for another 30 to 45 minutes. The dough will rise again and become slightly puffy.
This second rise helps create a light texture and soft crumb inside the bread.
🔥 Step 7: Baking the Bread
Preheat your oven to 180°C (350°F).
Place the loaf pan in the oven and bake for 25 to 35 minutes. The bread will slowly turn golden brown on top.
To check if it is done, tap the top of the loaf. If it sounds hollow, the bread is fully baked.
You can also insert a toothpick in the center — if it comes out clean, the bread is ready.
🧈 Step 8: Cooling Process
Once baked, remove the bread from the oven and let it sit in the pan for 10 minutes. Then carefully transfer it to a wire rack.
Allow it to cool completely before slicing. Cutting it too early can make the inside sticky and ruin the texture.
Patience is key for perfect slices.
🍞 What is the End Piece (Heel of Bread)?
Every loaf of bread has two end slices, commonly known as the “heel” or “end piece.” Some people ignore it, but it is actually one of the most flavorful parts of the loaf.
The crust is slightly thicker, giving it a crunchy texture, while the inside remains soft. It is perfect for toast, sandwiches, or even dipping into soups.
Many bread lovers actually prefer the heel because of its rich crust flavor.
💡 Helpful Tips for Perfect Bread
- Always use fresh yeast for best results
- Kneading properly is very important for softness
- Do not rush the rising process
- Milk adds richness and softness to the bread
- Avoid overbaking or the bread will become dry
- Let the bread cool completely before slicing
🥪 Serving Ideas
This sandwich bread is extremely versatile. You can use it in many delicious ways:
- Classic butter toast
- Jam or honey sandwiches
- Egg and mayo sandwiches
- Grilled cheese sandwiches
- French toast
- Garlic bread slices
❤️ Final Thoughts
Making homemade sandwich bread is a rewarding experience. The process is simple, relaxing, and the result is far better than store-bought bread. You get fresh, chemical-free, soft, and delicious slices that your whole family will love.
The smell of freshly baked bread, the golden crust, and the soft fluffy inside make it worth every minute spent in the kitchen. Once you try this recipe, you may never want to buy bread from the store again.
And don’t forget — even the end piece (heel) is delicious, so nothing goes to waste!


