Classic Artisan Sourdough Bread Recipe
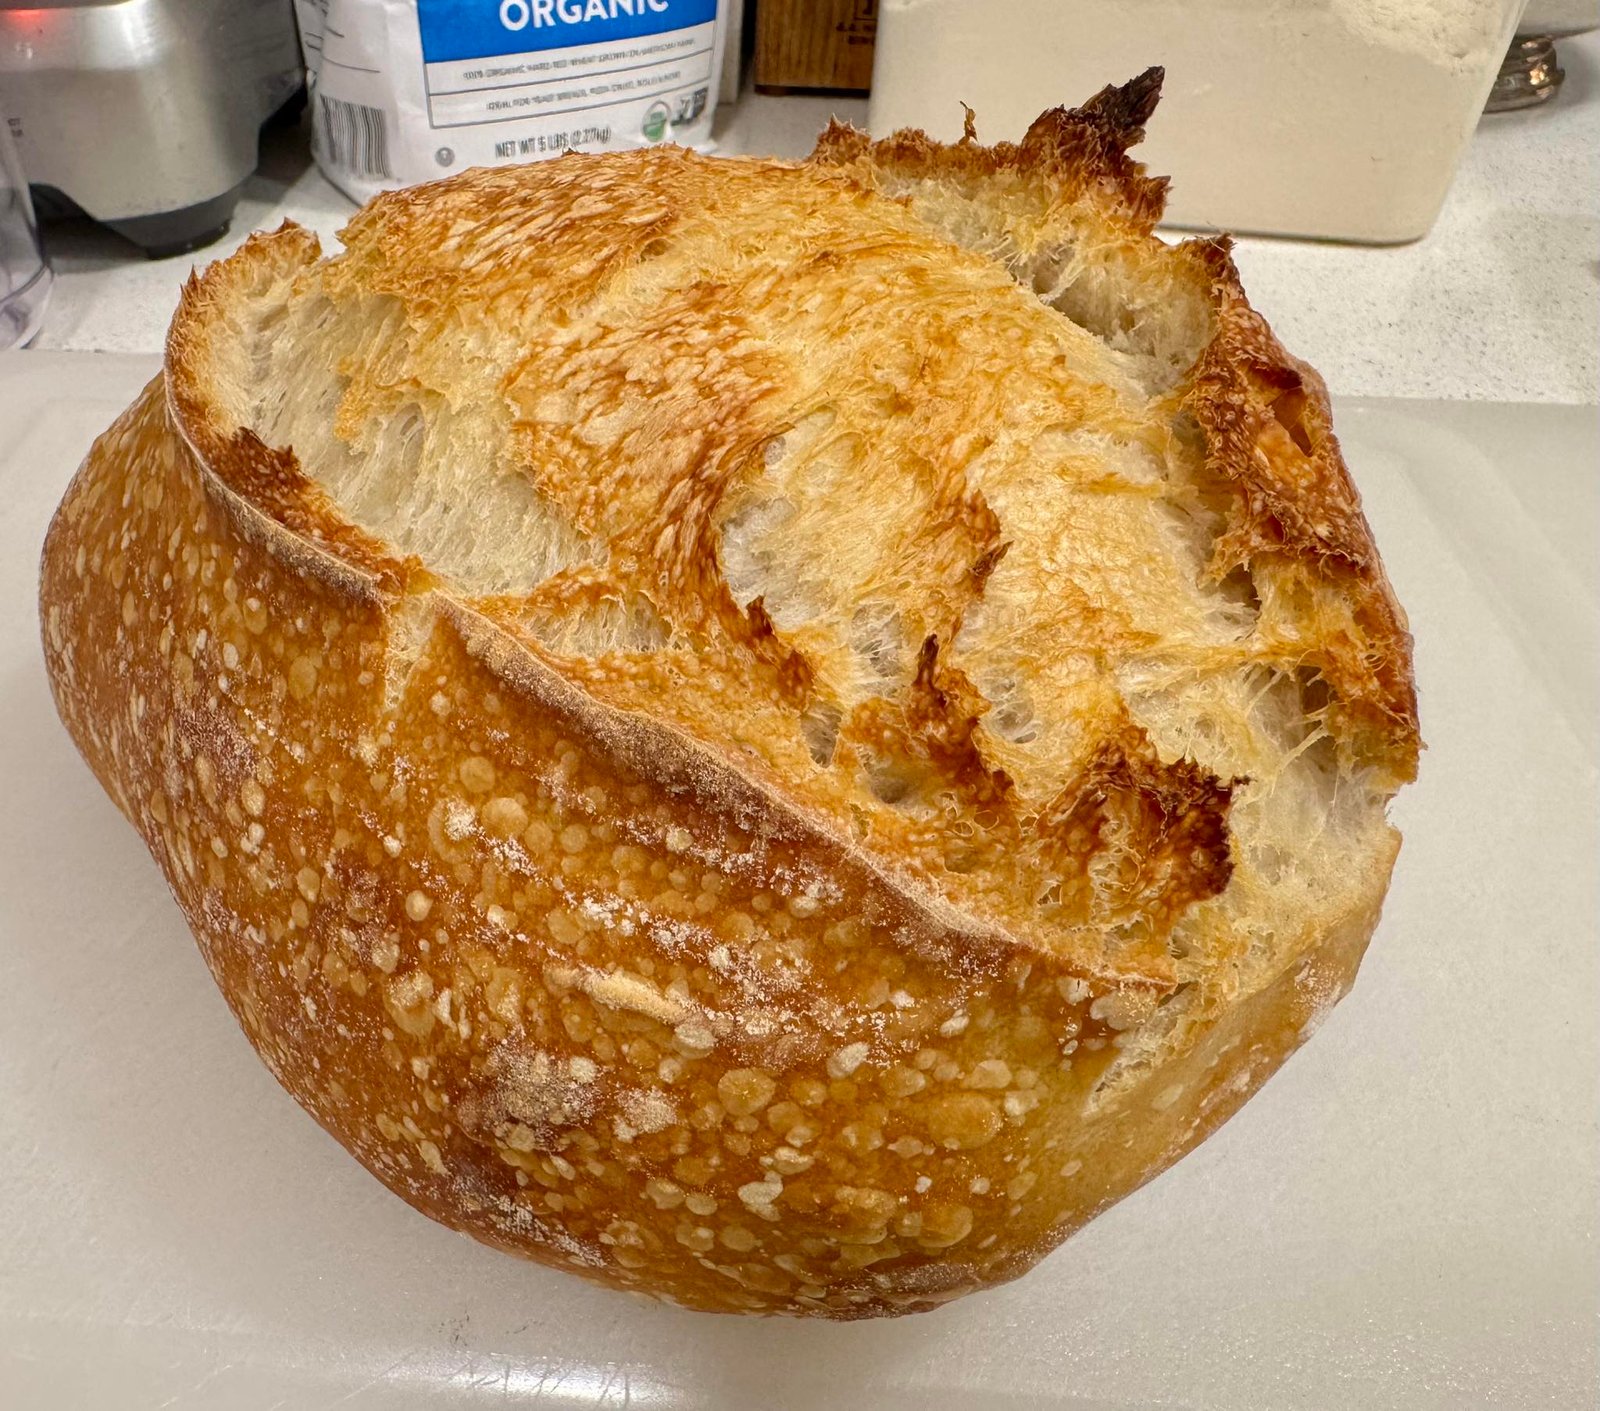
There’s nothing quite like the smell of freshly baked sourdough bread filling the kitchen. This beautiful artisan loaf has everything sourdough lovers dream about — a crispy golden crust, dramatic oven spring, airy soft crumb, and deep rich flavor developed through slow fermentation. With its rustic crackled exterior and fluffy interior, this homemade sourdough bread looks straight out of a professional bakery.
One of the best things about sourdough is that it uses simple ingredients yet creates incredible flavor naturally. The long fermentation process gives the bread its signature tangy taste while improving texture and digestibility. Whether you enjoy it toasted with butter, dipped into soup, or used for sandwiches, this loaf is comforting, hearty, and absolutely delicious.
This recipe is perfect for both beginners and experienced bakers. It may take time and patience, but the result is completely worth it. Once you hear that crispy crust crackling as the bread cools, you’ll understand why homemade sourdough is so special.
Why You’ll Love This Recipe
- Crispy bakery-style crust
- Soft airy interior with beautiful holes
- Deep tangy sourdough flavor
- Made with simple ingredients
- Naturally fermented
- Perfect for sandwiches, toast, or soups
- Stunning artisan appearance
Ingredients
- 500g bread flour
- 350g warm water
- 100g active sourdough starter
- 10g salt
Equipment Needed
- Large mixing bowl
- Dutch oven
- Dough scraper
- Kitchen towel or proofing basket
- Sharp knife or bread lame
Step 1: Feed Your Starter
For the best sourdough bread, start with a strong active sourdough starter. Feed your starter about 4–6 hours before mixing the dough. It should be bubbly, doubled in size, and active.
A healthy starter is the key to getting a beautiful rise and airy texture.
Step 2: Mix the Dough
In a large bowl, combine the warm water and active sourdough starter. Stir until the starter dissolves into the water.
Add the bread flour and mix until no dry flour remains. The dough will look rough and shaggy at first.
Cover the bowl and let it rest for 30 minutes. This process is called autolyse and helps gluten development naturally.
Step 3: Add Salt
Sprinkle the salt over the dough. Wet your hands slightly and work the salt into the dough by squeezing and folding gently.
The dough will become smoother and more elastic as you mix.
Step 4: Stretch and Folds
Over the next 2 hours, perform 4 sets of stretch and folds every 30 minutes.
To do this:
- Grab one side of the dough
- Stretch it upward gently
- Fold it over the center
- Rotate the bowl and repeat
This technique strengthens the dough without traditional kneading and helps create that beautiful airy crumb.
After each fold, the dough will feel stronger and smoother.
Step 5: Bulk Fermentation
Cover the dough and let it rise at room temperature for about 4–6 hours.
The dough should become puffy, airy, and slightly jiggly. Fermentation time depends on the temperature in your kitchen.
A warm kitchen speeds up the process, while cooler temperatures slow it down.
Step 6: Shape the Dough
Lightly flour your work surface and gently turn the dough out.
Shape the dough into a round loaf by folding the edges inward and creating surface tension on the outside.
Be gentle so you don’t deflate the air bubbles developed during fermentation.
Place the dough into a floured proofing basket or bowl lined with a floured towel.
Step 7: Cold Proof
Cover the dough and refrigerate overnight.
Cold proofing improves flavor, texture, and makes scoring easier before baking.
The slow fermentation develops that classic sourdough taste everyone loves.
Step 8: Bake the Bread
Preheat your oven to 230°C (450°F) with a Dutch oven inside for at least 30 minutes.
Carefully place the dough onto parchment paper and score the top using a sharp blade.
Transfer the dough into the hot Dutch oven.
Bake covered for 30 minutes.
Remove the lid and continue baking for another 15–20 minutes until the crust becomes deep golden brown and crispy.
The crust should sound hollow when tapped.
Cooling the Bread
Once baked, transfer the loaf to a cooling rack and let it cool completely before slicing.
This step is important because the inside continues setting while cooling.
Cutting too early can make the crumb gummy.
Texture and Flavor
This artisan sourdough loaf has an incredible texture. The crust is crispy, blistered, and beautifully caramelized, while the inside stays light, chewy, and airy.
The long fermentation creates a slightly tangy flavor that makes sourdough unique and deeply satisfying.
Every slice tastes rustic, comforting, and homemade.
Serving Ideas
This bread pairs beautifully with:
- Salted butter
- Soups and stews
- Olive oil and balsamic vinegar
- Sandwich fillings
- Avocado toast
- Cheese boards
It’s also amazing toasted the next morning.
Storage Tips
Store the bread at room temperature wrapped in a towel or bread bag for up to 3 days.
For longer storage, slice and freeze the loaf. Toast slices directly from frozen whenever needed.
Avoid refrigerating because it dries out the bread faster.
Tips for Perfect Sourdough
- Use bread flour for better gluten strength
- Make sure your starter is active and bubbly
- Don’t rush fermentation
- Handle the dough gently during shaping
- Preheat the Dutch oven properly for maximum oven spring
- Allow the loaf to cool fully before slicing
Final Thoughts
Making homemade artisan sourdough bread is more than just baking — it’s an experience. From feeding the starter to hearing the crust crackle as the loaf cools, every step feels rewarding and comforting.
This rustic sourdough loaf delivers everything you want in homemade bread: crispy crust, airy crumb, deep flavor, and stunning bakery-style appearance. Once you bake your own sourdough, it’s hard to go back to store-bought bread again.
Fresh, warm, and made with love — this is true artisan sourdough at its finest 🍞✨


