Sourdough Baguettes Recipe – Crispy Crust, Soft Airy Center & Rich Traditional Flavor
Nothing compares to the smell of fresh homemade sourdough baguettes coming out of the oven. These classic French-style loaves have a crispy golden crust, chewy texture, and beautiful airy crumb that makes every bite unforgettable. Unlike regular bread, sourdough baguettes are naturally fermented using a sourdough starter, giving them a deep flavor and rustic character that bakers have loved for centuries.
Whether you enjoy them with butter, soups, sandwiches, or olive oil, these baguettes bring bakery-quality bread right into your kitchen. The slow fermentation process may take time, but the flavor and texture are completely worth it.
The History of Sourdough Bread
Sourdough is one of the oldest forms of bread in human history. Ancient civilizations used natural wild yeast and fermented dough long before commercial yeast existed. Historians believe sourdough baking dates back over 5,000 years to Ancient Egypt, where bakers discovered that dough left sitting naturally began to rise.
Over time, sourdough spread throughout Europe and became especially popular in France, where baguettes became a symbol of traditional baking culture. French bakers perfected the art of crusty bread with soft interiors, and sourdough baguettes are still considered one of the most loved artisan breads today.
The natural fermentation process not only creates incredible flavor but also helps improve texture and digestibility. That’s why many home bakers continue to love traditional sourdough recipes even today.
Ingredients
For the Dough
- 500g bread flour
- 350g lukewarm water
- 100g active sourdough starter
- 10g salt
Optional
- Rice flour or extra flour for dusting
Step 1: Feed Your Starter
About 4–6 hours before mixing your dough, feed your sourdough starter until it becomes bubbly, active, and doubled in size. A healthy starter is the secret to light, airy baguettes with a beautiful rise.
If your starter is weak or inactive, the bread may turn dense instead of fluffy.
Step 2: Mix the Dough
In a large mixing bowl, combine the lukewarm water and active sourdough starter. Stir until mostly dissolved.
Add the bread flour and mix until no dry flour remains. The dough will look shaggy at this stage, and that is completely normal.
Cover the bowl and let the dough rest for 30 minutes. This process is called autolyse, which helps the flour absorb water and improves gluten development for better texture.
After resting, add the salt and mix thoroughly using your hands or a dough scraper until fully incorporated.
Step 3: Stretch and Fold
Over the next 2 hours, perform stretch-and-folds every 30 minutes.
How to Stretch and Fold:
- Wet your hands lightly
- Grab one side of the dough
- Stretch it upward gently
- Fold it over itself
- Rotate the bowl and repeat 4 times
This technique strengthens the dough naturally without kneading. As you continue, the dough will become smoother, elastic, and easier to handle.
Step 4: Bulk Fermentation
Cover the bowl and let the dough ferment at room temperature for about 4–6 hours.
The dough should become puffy, soft, and noticeably risen. Depending on the temperature of your kitchen, this process may take longer. Warmer kitchens speed up fermentation, while colder rooms slow it down.
Do not rush this step because proper fermentation builds flavor and texture.
Step 5: Cold Ferment
Transfer the covered dough to the refrigerator overnight or for 8–12 hours.
Cold fermentation is what gives sourdough baguettes their signature rich flavor and slightly tangy taste. It also makes the dough easier to shape the next day.
Many artisan bakers prefer long cold fermentation because it develops deeper complexity in the bread.
Step 6: Divide and Pre-Shape
The next day, lightly flour your work surface and gently remove the dough from the bowl.
Divide it into 2 or 3 equal portions depending on your desired baguette size.
Shape each piece loosely into a rectangle or log shape. Cover with a towel and let them rest for 20 minutes. This resting period relaxes the gluten and makes final shaping easier.
Step 7: Shape the Baguettes
Flatten each dough piece gently into a rectangle.
- Fold the top third downward and seal lightly
- Fold the bottom third upward and seal again
- Roll the dough gently into a long baguette shape about 12–15 inches long
Place the shaped baguettes seam-side down onto parchment paper or a floured towel.
Try not to press out too much air while shaping because those trapped air pockets create the classic open crumb inside the bread.
Step 8: Final Proof
Cover the baguettes lightly and allow them to proof for 1–2 hours until slightly puffy.
Meanwhile, preheat your oven to 475°F (245°C). Place a baking tray, pizza stone, or baking steel inside while the oven heats.
A properly preheated surface helps create the crispy crust sourdough baguettes are famous for.
Step 9: Score and Bake
Using a sharp blade or bread lame, make 3–4 diagonal slashes across each baguette.
Scoring allows the bread to expand properly during baking and creates the classic artisan appearance.
To create steam:
- Place a tray of hot water on the bottom oven rack
or - Spray water inside the oven carefully before closing the door
Bake for 20–25 minutes until the baguettes become deep golden brown with a crisp crust.
Rotate halfway through baking if necessary for even color.
Step 10: Cool and Enjoy
Transfer the baked sourdough baguettes to a wire rack and allow them to cool for at least 30 minutes before slicing.
Cooling is important because the inside of the bread continues setting as it rests.
Enjoy your homemade sourdough baguettes with:
- Butter
- Soups
- Sandwiches
- Olive oil and herbs
- Cheese boards
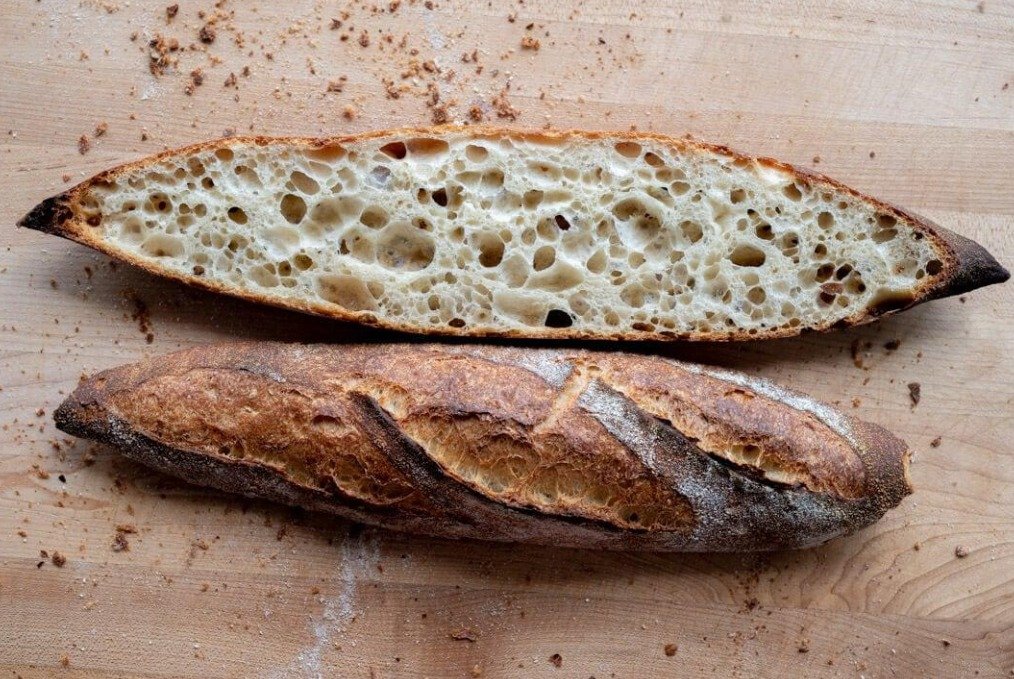
Every slice has a perfect balance of crispy crust and soft airy center.
Tips for Perfect Sourdough Baguettes
- Always use an active starter for best results
- Avoid adding too much flour while shaping
- Cold fermentation improves flavor dramatically
- Steam helps create a crispy artisan crust
- Let the bread cool fully before cutting
Final Thoughts
Homemade sourdough baguettes are one of the most rewarding breads you can bake. The slow fermentation process creates incredible flavor, beautiful texture, and a rustic artisan look that feels truly special.
While it may take patience, every step adds character to the bread. Once you taste the crispy crust and soft chewy interior, you’ll understand why traditional sourdough baking has remained popular for thousands of years.


