Artisan Sourdough Bread Recipe
There’s something so comforting about homemade sourdough bread. The crispy golden crust, the soft chewy center, and those beautiful airy holes make every slice feel bakery-style. This recipe creates a rustic artisan loaf that looks impressive but is surprisingly simple to make at home. I love baking this bread on cozy mornings because the smell fills the whole kitchen and makes everything feel warm and peaceful.
The best part about sourdough is its flavor. It has that slightly tangy taste with a chewy texture that pairs perfectly with butter, soup, sandwiches, or even just toasted on its own. Once you try homemade sourdough, it’s hard to go back to store-bought bread.
Why You’ll Love This Recipe
- Crispy and golden crust
- Soft, airy interior
- Naturally fermented flavor
- Simple ingredients
- Perfect for breakfast or sandwiches
Ingredients
For the Dough
- 500g bread flour
- 350g warm water
- 100g active sourdough starter
- 10g salt
Optional
- Rice flour for dusting
- Extra flour for shaping
Equipment Needed
- Large mixing bowl
- Dough scraper
- Kitchen towel
- Dutch oven or baking stone
- Sharp knife or bread lame
Step 1: Feed Your Starter
Before starting the dough, make sure your sourdough starter is active and bubbly. Feed it about 4–6 hours before baking.
A healthy starter should:
- Double in size
- Smell slightly tangy
- Have lots of bubbles
This step is important because it helps the bread rise beautifully.
Step 2: Mix the Dough
In a large bowl, combine:
- Warm water
- Active sourdough starter
Mix until the starter dissolves in the water. Then add the bread flour and mix until no dry flour remains. The dough will look shaggy and sticky, which is completely normal.
Cover the bowl and let it rest for 30 minutes. This resting stage is called autolyse and helps develop gluten naturally.
Step 3: Add Salt
After resting, sprinkle the salt over the dough. Wet your hands slightly and fold the dough until the salt is fully incorporated.
The dough will become smoother as you work with it.
Step 4: Stretch and Fold
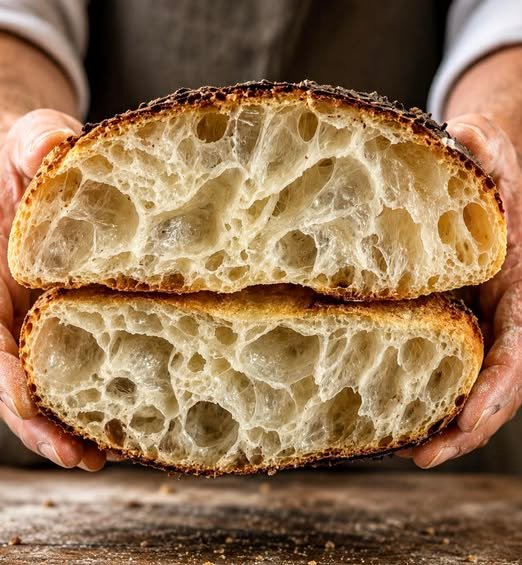
To create that airy open crumb like in the picture, stretch-and-folds are very important.
Every 30 minutes:
- Grab one side of the dough
- Stretch it upward
- Fold it over itself
Turn the bowl and repeat 4 times.
Do this process 4 rounds total over 2 hours.
You’ll notice the dough becoming smoother, stronger, and puffier after each fold.
Step 5: Bulk Fermentation
Cover the bowl and let the dough rise at room temperature for 4–6 hours.
The dough should:
- Increase in size
- Look airy
- Jiggle slightly when shaken
Fermentation time depends on your kitchen temperature. Warmer kitchens ferment faster.
Step 6: Shape the Dough
Lightly flour your counter and gently place the dough on it.
Shape it by:
- Folding the edges inward
- Rotating while pulling toward yourself
This creates surface tension and helps the loaf hold its shape.
Place the dough seam-side up in a floured proofing basket or bowl lined with a towel.
Step 7: Cold Proof
Cover the dough and refrigerate overnight for 8–12 hours.
Cold proofing improves:
- Flavor
- Texture
- Crust development
It also makes scoring easier before baking.
Step 8: Bake the Bread
Preheat your oven to 250°C (480°F) with the Dutch oven inside for at least 30 minutes.
Carefully place the dough onto parchment paper. Score the top with a sharp blade.
Bake:
- 20 minutes with lid on
- 20–25 minutes lid off
The crust should become deep golden brown and crispy.
Step 9: Cool Before Slicing
This is the hardest part — waiting!
Let the bread cool for at least 1 hour before slicing. Cutting too early can make the inside gummy.
Once sliced, you’ll see that beautiful open crumb with airy pockets just like the loaf in the picture.
Tips for Perfect Sourdough
- Use bread flour for better gluten structure
- Don’t rush fermentation
- Handle the dough gently
- Cold proof overnight for the best flavor
- Steam helps create a crispy crust
Serving Ideas
This sourdough bread tastes amazing with:
- Butter and honey
- Avocado toast
- Soups and stews
- Grilled cheese sandwiches
- Olive oil and herbs
It’s also perfect toasted for breakfast.
Storage Tips
- Store at room temperature wrapped in a towel for 2 days
- Freeze slices for longer storage
- Reheat in the oven to refresh the crust
Final Thoughts
Homemade sourdough bread may take time, but the result is absolutely worth it. The crispy crust, chewy texture, and airy interior make every bite feel special. Baking sourdough becomes relaxing and rewarding once you get the hang of it, and every loaf feels unique.
This artisan loaf is one of those recipes that makes your kitchen feel like a real bakery. Perfect for sharing with family, serving at dinner, or enjoying warm with butter straight from the oven.


