Homemade Sourdough Bread Recipe – Crispy Outside, Soft Inside
There is something truly special about homemade sourdough bread. The smell of fresh bread baking in the kitchen, the crispy golden crust, and the soft fluffy texture inside make it one of the most comforting foods ever. I started making sourdough bread at home because I wanted to try something healthy and homemade for my family. The first time I baked it, everyone in my house loved it so much that now they ask me to make it almost every week. Fresh sourdough bread with butter, soup, or even tea feels warm and comforting after a long day.
What makes sourdough bread different from normal bread is the natural fermentation process. Instead of using instant yeast, sourdough uses a sourdough starter made from flour and water. This process gives the bread a rich flavor, chewy texture, and beautiful airy holes inside. Many people also believe sourdough is easier to digest compared to regular bread.
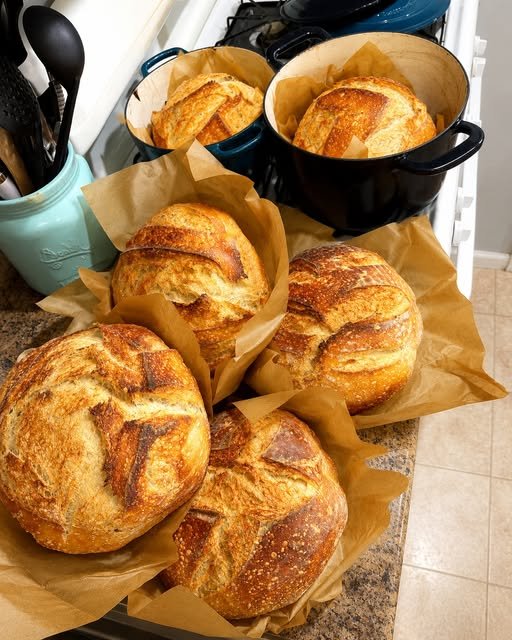
The best part about this recipe is that it looks professional but is actually simple once you understand the steps. You do not need expensive bakery equipment. With patience and a little practice, anyone can make beautiful artisan sourdough loaves at home just like the ones in the picture. The crunchy crust and rustic design make the bread look like it came straight from a bakery.
Ingredients
Here are the ingredients you will need for one large sourdough loaf:
- 125g active sourdough starter
- 325g warm filtered water
- 500g bread flour
- 10g salt
Optional:
- Rice flour for dusting
- Extra flour for shaping
Step 1 – Prepare the Dough
In a large mixing bowl, add the warm filtered water and sourdough starter. Mix gently until the starter dissolves into the water. Then add the bread flour and salt. Stir everything together until a rough dough forms.
At first, the dough may look sticky and messy, but that is completely normal. Sourdough dough usually feels wetter than regular bread dough. Use your hands to combine everything well until no dry flour remains.
Once combined, cover the bowl with a clean towel and let the dough rest for about 30 to 45 minutes. This resting period is called the autolyse stage. It helps the flour absorb the water and starts gluten development naturally.
Step 2 – Stretch and Fold Process
After resting, it is time to strengthen the dough. Instead of traditional kneading, sourdough uses a stretch-and-fold method.
Wet your hands slightly to prevent sticking. Grab one side of the dough, stretch it upward gently, and fold it over the center. Rotate the bowl and repeat this process on all four sides.
Cover the bowl and let the dough rest for 30 minutes.
Repeat this process about 4 times over the next 2 hours. You will notice the dough becoming smoother, stronger, and more elastic after each fold. This step is very important because it builds structure in the bread while keeping the inside soft and airy.
Step 3 – Bulk Fermentation
Now let the dough rise at room temperature. Cover the bowl and leave it for about 4 to 6 hours depending on the temperature of your kitchen.
During this time, the dough will slowly ferment and increase in size. A warm kitchen helps the dough rise faster, while colder temperatures may take longer. You will know the dough is ready when it looks puffier and airy with bubbles forming inside.
Patience is the key to perfect sourdough. Slow fermentation creates the delicious tangy flavor that makes sourdough unique and special.
Step 4 – Shape the Dough
Lightly flour your countertop and gently place the dough onto the surface. Be careful not to press out all the air bubbles.
Shape the dough into a round loaf by folding the edges toward the center. Then gently drag the dough across the counter to create surface tension. This helps the bread hold its shape during baking.
Place the shaped dough into a bowl or proofing basket lined with a towel and dusted with flour. Cover it again and let it rest for another hour at room temperature or place it in the refrigerator overnight for deeper flavor.
Cold fermentation overnight also makes the bread easier to score and gives it a more complex taste.
Step 5 – Preheat the Oven
Place a Dutch oven or heavy baking pot into the oven and preheat it to 230°C (450°F). The pot needs to become very hot before baking because steam is important for creating the crispy crust.
While the oven heats, prepare parchment paper for transferring the dough safely into the hot pot.
Step 6 – Score the Bread
Carefully flip the dough onto parchment paper. Use a sharp knife or bread lame to score the top of the dough. Scoring allows the bread to expand while baking and also creates beautiful artisan patterns.
You can make simple lines or creative designs depending on your style. Even simple cuts look beautiful after baking.
Step 7 – Bake the Bread
Carefully place the dough into the hot Dutch oven using the parchment paper. Cover with the lid and bake for 20 minutes.
After 20 minutes, remove the lid and continue baking for another 20 to 25 minutes until the crust becomes deep golden brown and crispy.
Your kitchen will smell absolutely amazing during this step. The crackling sounds from the cooling bread are one of the best parts of homemade sourdough baking.
Step 8 – Cool Before Slicing
Once baked, transfer the bread to a wire rack and allow it to cool for at least one hour before cutting.
This step is difficult because fresh bread smells irresistible, but cooling helps the inside finish cooking properly. Cutting too early may make the texture gummy.
When sliced, you will see a soft airy crumb inside with a crispy crunchy crust outside.
Serving Ideas
Homemade sourdough bread tastes delicious in many ways:
- Spread with butter while still slightly warm
- Served with soup or pasta
- Used for sandwiches
- Toasted with jam or honey
- Paired with eggs for breakfast
It also makes incredible garlic bread and grilled cheese sandwiches.
Final Thoughts
Making sourdough bread at home is more than just baking. It feels relaxing, rewarding, and comforting. Every loaf has its own unique shape and personality. Even if your first loaf is not perfect, the process itself is enjoyable and satisfying.
The crispy crust, chewy texture, and rich flavor make homemade sourdough much better than store-bought bread. Once you taste fresh sourdough from your own kitchen, it becomes hard to go back to regular bread.
This recipe has become one of my favorite homemade creations because it brings warmth and happiness to my family. Fresh bread on the table always creates a cozy feeling at home, and nothing compares to the pride of baking your own beautiful artisan loaf from scratch.


